Organistation Des Pages Indesign Sans Page De Garde
Ok, picture this: Me, staring blankly at my InDesign screen. Hours spent perfecting a brochure, only to realize... I completely forgot about page numbering. And even worse, I didn't want a number plastered on the cover. Ugh, the design gods were clearly laughing. Has this happened to you? Don't lie, we've all been there! That awkward moment when technical details clash with artistic vision. But fear not, my friends, because today we're tackling precisely that: organizing your InDesign pages without sacrificing your beautiful cover page.
Le Problème (And Why We Hate It)
Let's be honest, default InDesign numbering isn't always... forgiving. You usually end up with that dreaded "1" on your front page, ruining the sleek design you painstakingly crafted. (Who needs that kind of negativity in their lives?)
We want control! We want elegance! We want to start our numbering on page 2, or page 3, or wherever our creative souls desire! Is that too much to ask?
La Solution: Numbering Sections Like a Pro
The secret weapon? Sections! They're like little organizational ninjas that allow you to manipulate page numbering to your heart's content. Here's the breakdown:
Étape 1: Break It Down (The Section, That Is)
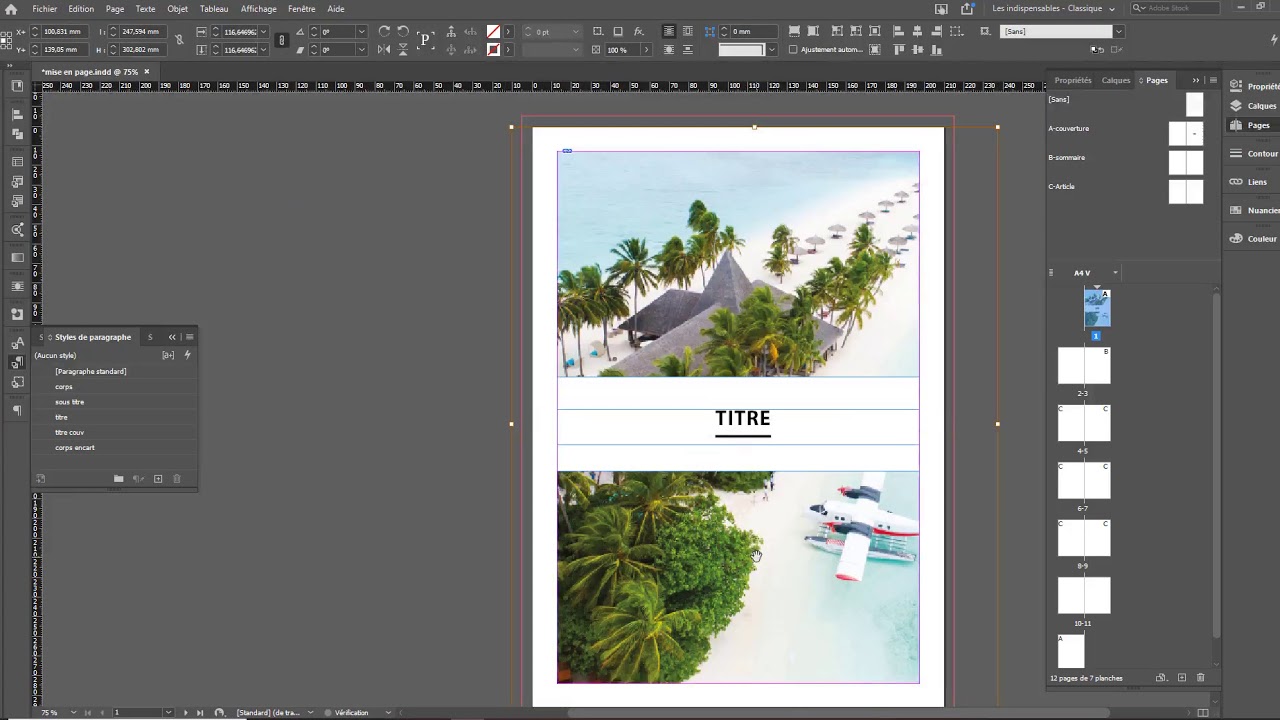
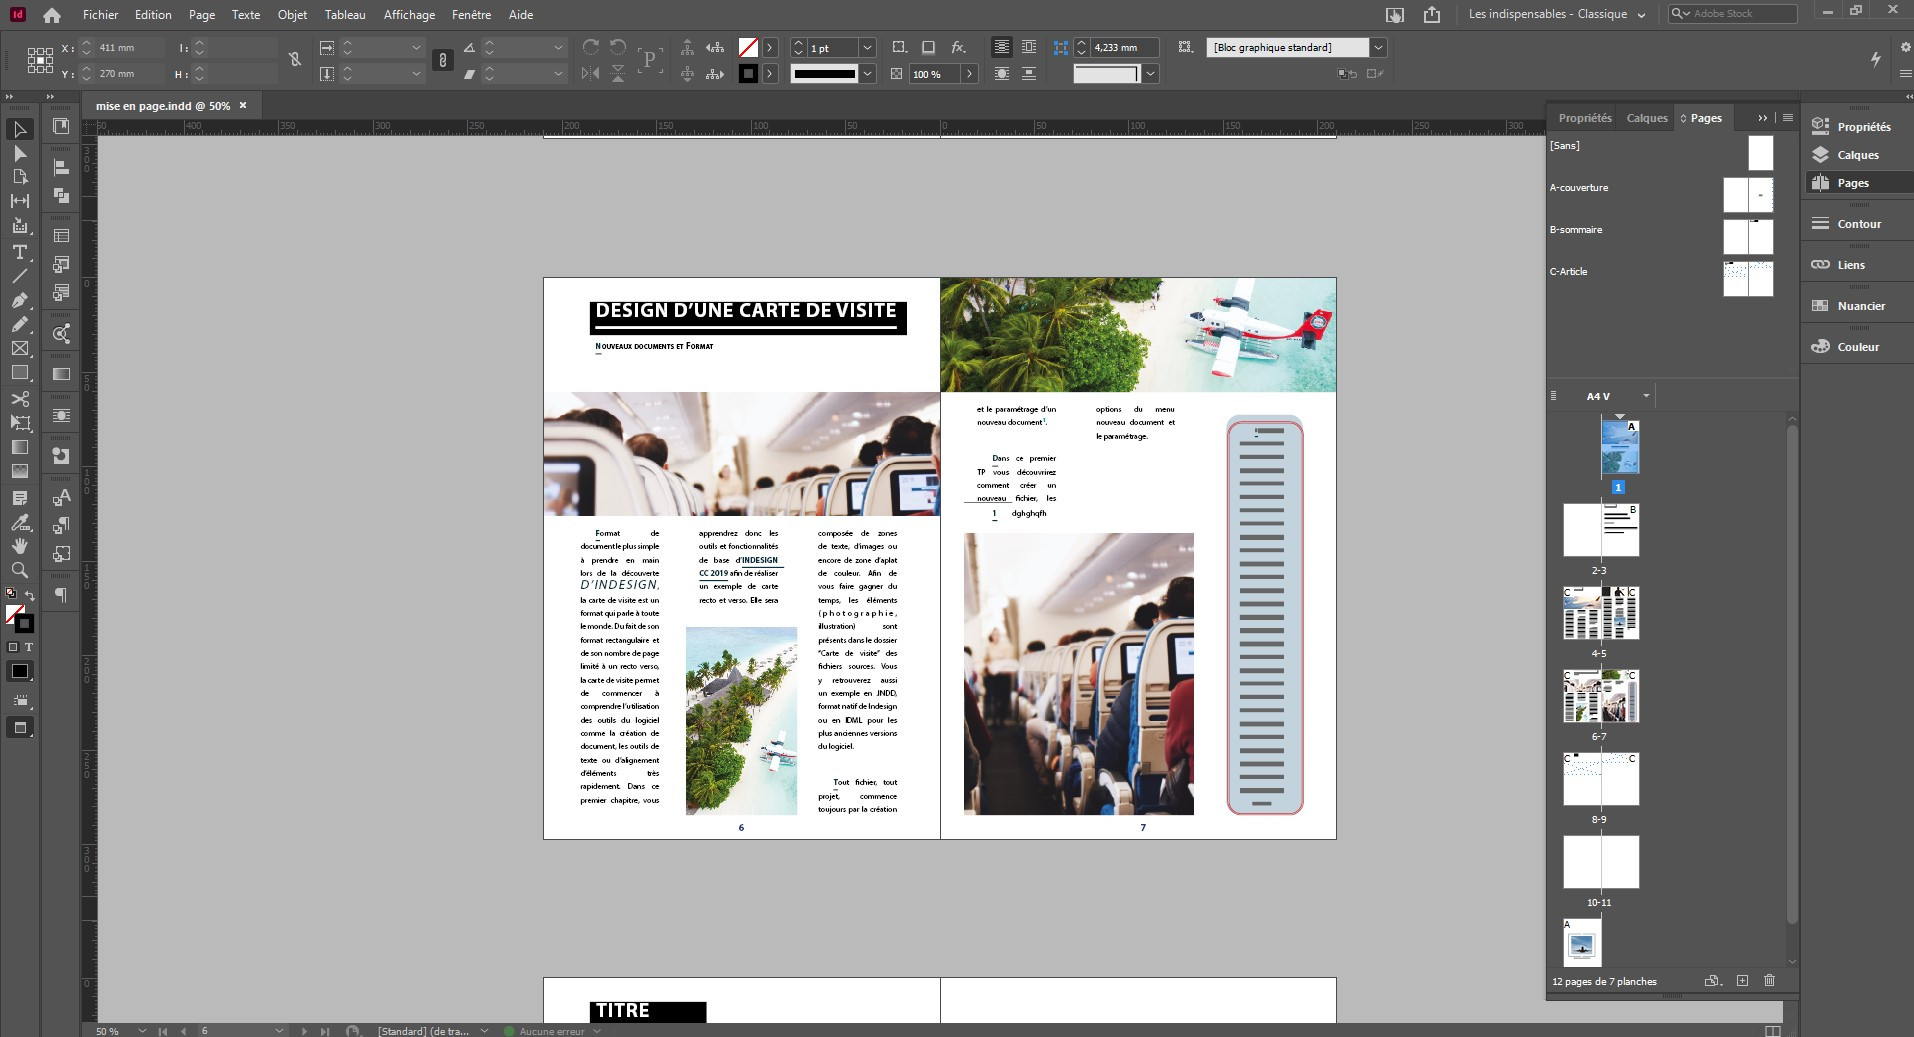
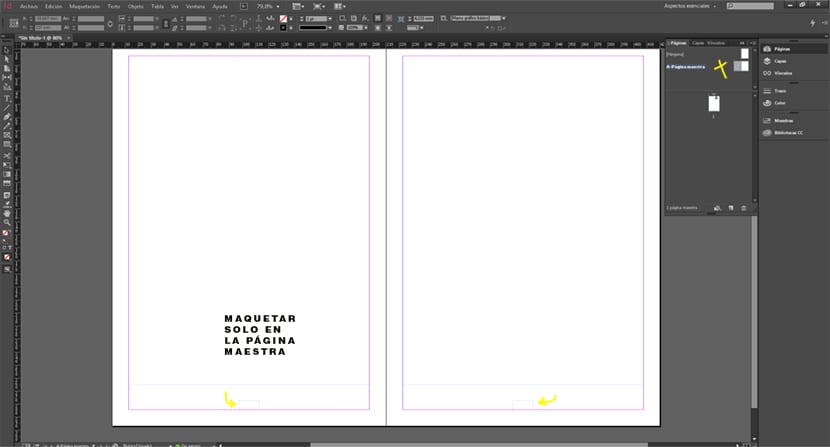
Go to your Pages panel (Window > Pages, if you're feeling lost). Find the page *after* your cover. That's where the magic begins. Right-click on that page and select "Numbering & Section Options...".
A little window pops up. Don't panic! It's friendlier than it looks. In the "Section" section (duh!), check the "Start Section" box.
Pro Tip: Give your section a name! "Introduction," "Chapter 1," whatever floats your boat. It helps you keep track later.
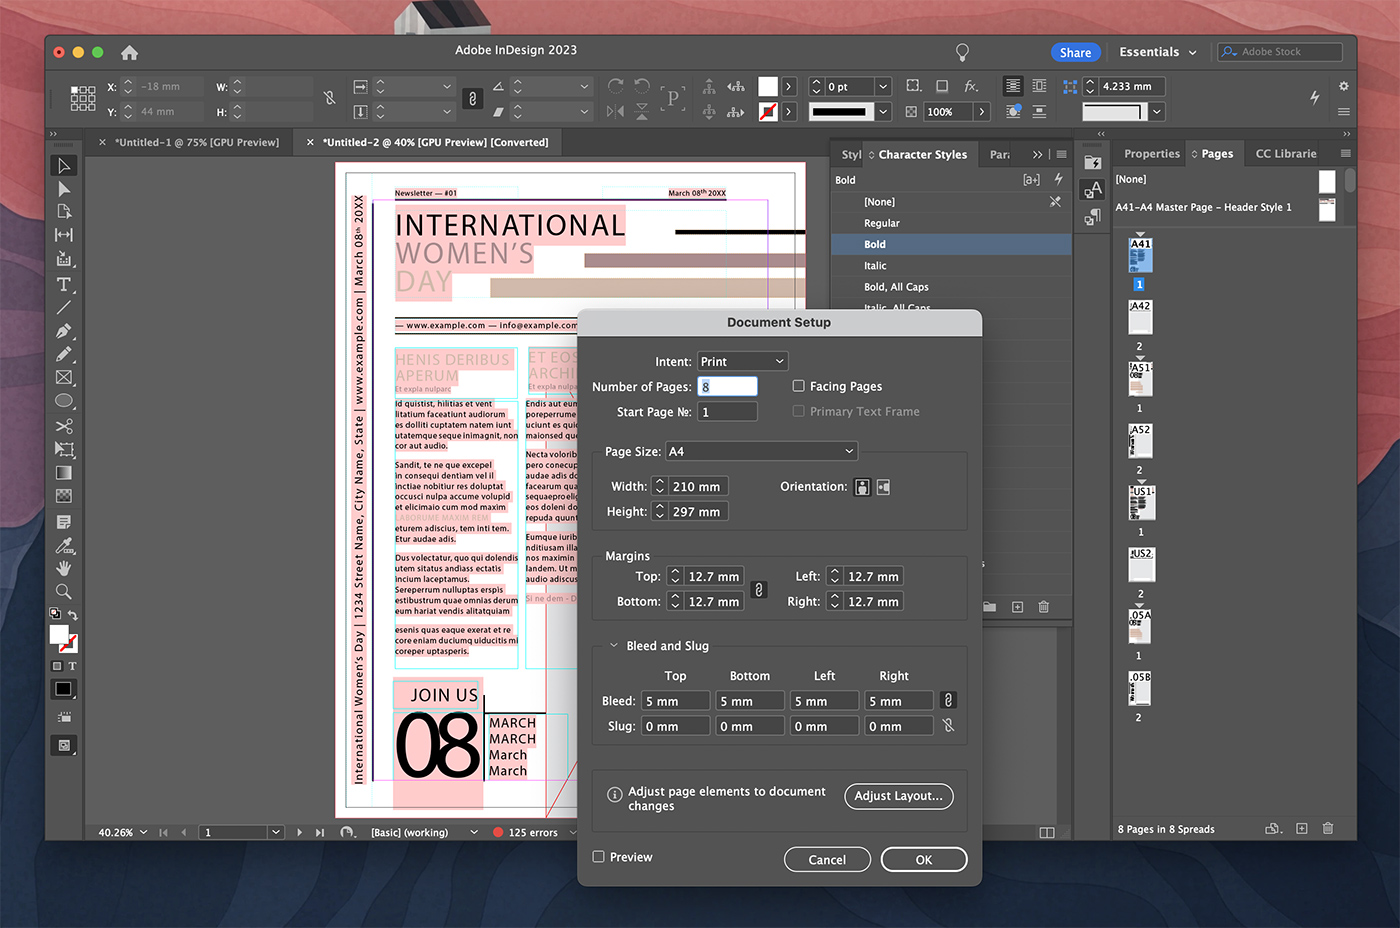
Étape 2: Starting the Count (And Excluding the Cover)
Now, in that same window, look for the "Page Numbering" section. Here's where you can decide how your numbering will look. Choose your style (1, 2, 3; i, ii, iii; a, b, c – go wild!) and, most importantly, set the "Start Page Number" to 1. This tells InDesign to *restart* the numbering from this point forward.
Click OK. Boom! Your numbering should start on page 2 (or 3, or wherever you created the section), leaving your cover gloriously number-free.
Side note: You can create multiple sections throughout your document! This is incredibly useful for complex documents with different chapters or parts. Think of each section as its own little kingdom of page numbering.
Étape 3: The Master Page Tango (For Automatic Awesomeness)
Okay, manual page numbering is tedious. Nobody has time for that! Let's get those numbers automatically updated using Master Pages.
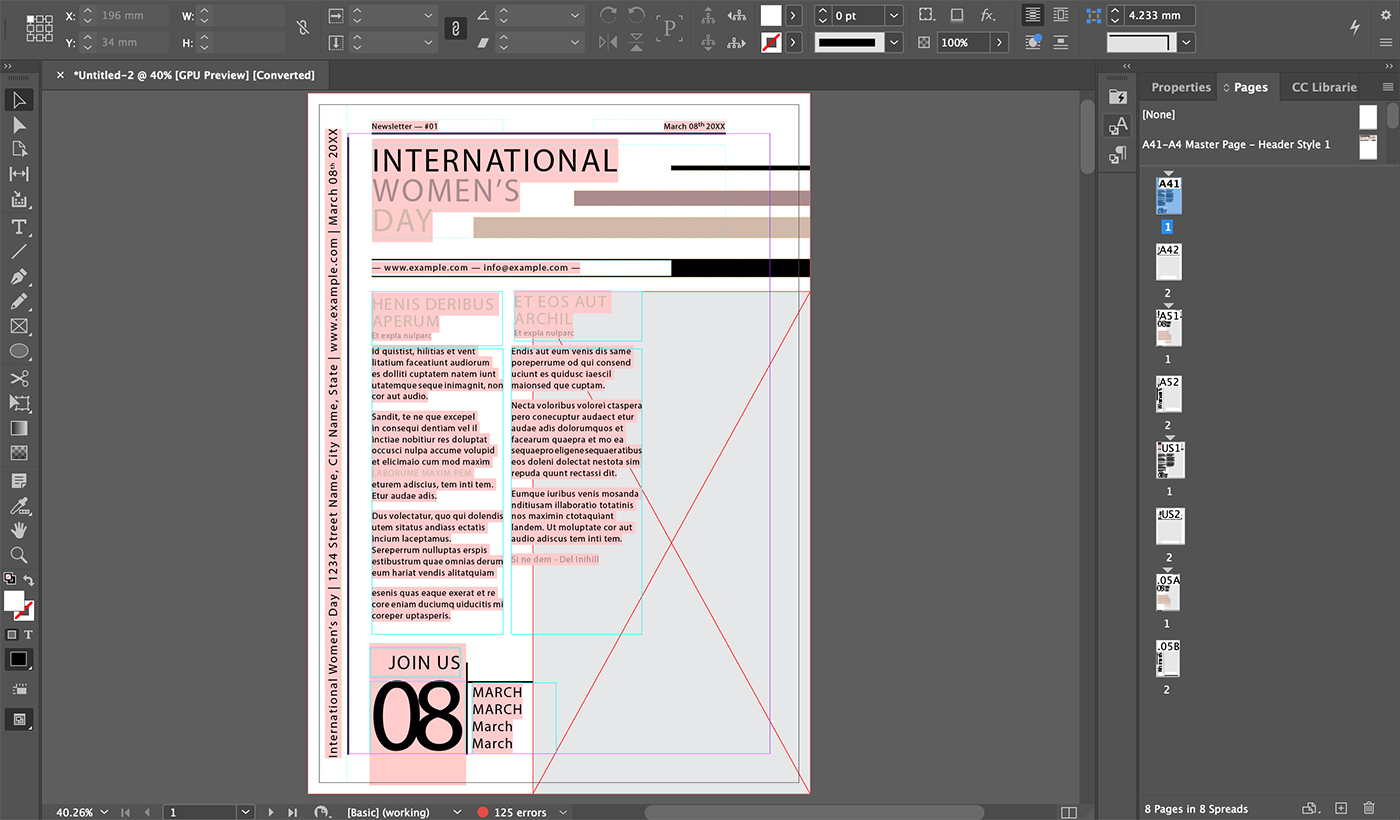
Go to your Master Page (usually called "A-Master"). Add a text box where you want the page number to appear. With the text box selected, go to Type > Insert Special Character > Markers > Current Page Number.
You'll see a letter "A" appear. That's good! That means InDesign is ready to automatically insert the page number. Now, drag that Master Page onto the pages in your document. Voila! Automatic page numbers that respect your sections.
Warning: If you've overridden your Master Page elements on specific pages, you might need to reapply the Master Page or manually adjust the page number. It's a dance, but you'll get the hang of it!
Advanced Wizardry (Optional, But Cool)
- Different numbering styles in different sections: As mentioned, you can have roman numerals in your introduction and Arabic numerals in the main body.
- Prefixes and Suffixes: Add a letter or word before or after your page number for extra clarity. (e.g., "Page A-1," "Chapter 2 - Page 5")
- Hiding page numbers on specific pages: If you want to suppress the page number on a particular page within a section, simply override the Master Page on that page and delete the page number text box.
Conclusion: Embrace the Power of Sections!
So there you have it! No more cover page chaos. With a little bit of section magic, you can control your InDesign page numbering and create documents that are both beautiful and organized. Now go forth and design! (And maybe grab a coffee. You deserve it.)